Event badges are the best way to identify yourself, especially when networking is a primary focus. Follow these guidelines and you will always be safe from sabotaging your success. So, what is the best way to print an event name badge?

Printing Event Badges
Providing pre-printed event badges is one of the most effective investments you can make to the success of an event, especially a networking event. Yet many people waste this opportunity to help guests meet and greet at an optimum level. Here are a few tips to ensure your event name badges look great and are the most productive.
Keep the Printing Simple
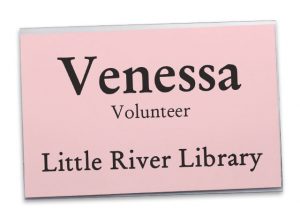
All your event badges need is a first and last name with your affiliation or company underneath. Think twice about the need to provide any more information beyond these basics.
Printing the first name larger than the last name
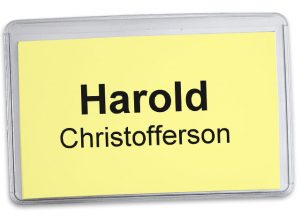
While there are no hard and fast rules governing whether to enlarge the person’s first name, I submit that it’s best to print both the first and last name in the same size font. You will obviously see the person’s first name. However, if the last name is too small to be easily read, an opportunity to connect is lost since a person’s identity comes from knowing both a person’s first and last name.
No Honorifics and Titles for Event Badges
Do not place honorifics such as Ph.D. or Dr. or titles such as President or Sales Manager on event badges. You can learn this information as you converse. Only at special events will honorifics or titles be helpful, such as a doctor’s convention where the doctor’s specialties are important or a company conference where titles let others know what that person’s responsibilities are.
Adding a Company or Organization Name
Besides a person’s first and last name, the only other information to print for an event badge is a person’s company or organization name; this is a great way to begin conversations. While we should all be proud of our affiliated organizations, seeing the person’s name is more important than knowing their affiliated company. Therefore, place the company name or logo at the bottom of the tag in a font size that’s easy to read yet smaller than the person’s name.
Host and Sponsor Organizations
Give acknowledgment to the sponsors of your event through the design of the badges, but never allow that information to override the all-important role of a name badge which is to introduce the person who is wearing it.
Choose a Font
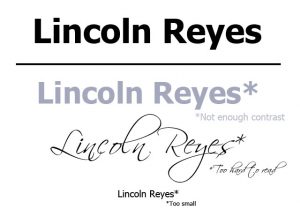
Use big, bold fonts for printing and avoid script or fancy fonts. The goal is to make the badges easy to read, so choose your font wisely. With several thousand choices on most computers, your name badges do not need to be boring when selecting a font for readability. Some popular fonts for name badges include Arial, Tahoma, Helvetica, Calibri and Times.
Font Size Matters
Print the names on the badges in a font size that practically fills the tag. It is a waste of an excellent networking tool to print the information on any badges in small type. Instead, begin with a large 40-point font and adjust the size to fit the names on each line. Some names are larger or shorter, so adjust the font size accordingly.
Print a Test of the Event Badges
Before printing your badges, print a single badge and look at it from the same distance it will be viewed at the event. Then, if there is any difficulty in reading any of the information, go back and make adjustments and try it again.
Now that you have your event badges, learn how to wear them at Event Name Tag Etiquette: Part 1.
By Syndi Seid, the world’s leading etiquette trainer, celebrity speaker and founder of San Francisco based Advanced Etiquette.
One thought on “Name Tag Etiquette: Part 2”