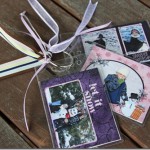
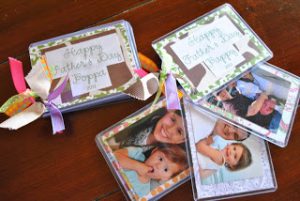
A photo album made from badge holders is the perfect holiday gift!
 With the holidays coming, people are looking for a creative way to display their pictures. And, many people look forward to receiving homemade gifts for the holidays. Here’s a great little tutorial on how to make a mini photo album for those wanting to see your holiday pictures!
Follow these five, easy steps to create your photo album.
Badge holders are perfect for this cute craft. And, every year people take so many photos that these will come in handy not only for the holidays but year round.
Step 1
Choose the badge holder size that you would prefer for your book. Yes, this step is that simple, but we do carry several different sizes and badge holder types that it is going to take a bit to decide what will work best for your project.
Step 2
Either work with the inserts that can be ordered with the badge holders, or make a template so you can trim each picture to the correct size. The photos will need to be cut to fit either the badge holder or any insert you want to fit into the album.
Step 3
 Find the pictures you want to use and place them in order. Are you focusing on a theme for your photo album? Maybe you’re creating this for a grandparent so that it should be full of pictures of their grandchildren. Or, perhaps you’re making this for a Christmas present, so you want holiday pictures. Birthdays, Mother’s Day, Father’s Day, Easter, the list goes on! Whatever your theme, make sure your photos match.
Place your pictures in order. Before you start filling your badge holders with priceless memories, remember that sometimes arrangement is essential. The organization will depend on your theme for your album.
Step 4
Start stuffing! Don’t forget that badge holders are clear and you can use both sides to display pictures. And, don’t limit yourself to just photos. Use the inserts to create unique messages for the recipient. With someone a happy birthday or Merry Christmas right in the middle of all the festive pictures.
 Another great idea is to use the badge holders with a dry erase marker. Scrawl out a cute message and then have a child sign it right on the badge holder. Or, if this album is a gift for a child, include pages that they can draw on with the dry erase markers.
Step 5
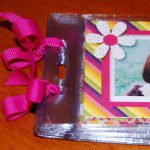
 Secure the badge holders together. Use some of our custom ribbon rolls to tie all your pictures together. Not only will the photos leave a lasting impression, but personalized ribbons are a great touch. There are so many ways to use ribbon to tie it all together. With the different punched holes and slots in each badge holder, creativity is key to finishing this project.
From creative, personalized ribbons to the final photo album, your loved ones are sure to enjoy this easy and fun craft for their holiday presents!

One thought on “Create A Photo Album in 5 Steps”